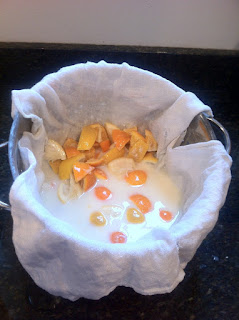
It is day 7 of the drunk milk experiment. I guess it isn't really an experiment since I'm following a
recipe, but it sure looks like a chemistry experiment. Check it out for yourself:
 |
| Madame Charnushka says "Take no long walks off short piers." |
The alcohol isn't separating from the rest of the stuff anymore, and bits of citrus pulp are now floating freely in the jug. This has been the status quo for the last two days, and we've been busy, so there haven't been any updates over the weekend. 'Busy with what?' you ask..?
 |
| Cowabunga! |
Busy-ness #1: It snowed! And we were the first ones at the sledding hill! Notice how dark the photo is? It was just after 8am. The boys were raring to go at 7, but I made them wait. Mommy needs a few moments to get going, especially on cold snowy mornings.
Busy-ness #2: Friday nights are movie and pizza nights at our household. This past Friday was a
Digimon marathon, and to keep my sanity I tackled one of the projects that has been on my mind - a plastic bag organizer.
 |
| A bag bag! |
I originally saw this on
Martha Stewart ages ago, read the how to, then promptly did something else. I recalled the basic instructions and winged it Friday as digimon were battling each other. Here's what I did:
- Grab a clean dish towel.
- Using scissors, cut the two long seamed edges off. I did not cut the corners off, thinking that the piece would be sturdier if I left the short seamed edges completely intact. Save the seam pieces.
- Fold in half, right side in, cut sides aligned.
- At this point I hand stiched the cut sides together with about a 1/4" seam allowance. I bet this would go much quicker with a sewing maching.
- Make one slit on the inside of the bottom seam, at both ends, big enough for a small button to pass through.
- Using 1/4" satin ribbon left over from the Christmas stockings, I tied one end of a 2' length to a small button. My helper Nathan threaded the button in one hole, through the seam and out the hole at the other end. We untied the button, cinched the seam so it was gathered up and had a smaller diameter than the rest of the bag, and tied the ribbon in a bow to hold the cinch.
- Take the reserved seam pieces that were cut off and tie them into a bow, leaving long tails at one end. Sew the tails to the top/uncinched part of the bag.
- Turn bag right side out. Fill with plastic bags. Hang someplace conveniently useful yet out of sight.
I didn't do any of Martha's ironing or pinning, I used ribbon instead of elastic, and I didn't use cotton tape for the hanger. Oops. I still love it. This will hang in the pantry as soon as husband puts up a hook. I was going to do it, but he wants to help, so I wait.
Busy-ness #3: A neighbor across the street had a baby last week, and I helped make dinner for her and her family. Someone else brought meatballs, and I brought a salad and biscuits. Not being able to make small portions of anything, there was enough for their family and ours. I used Erin's
Red Lobster Cheddar Bay Biscuit recipe at
mythirtyspot.com, and they were delicious! The salad had spinach, diced prunes, chopped toasted walnuts and asian dressing. I meant to put mandarin oranges in too, but I don't have any cans of them, so they got the salad as-was. After I brought the salad over, I realized I could just peel some
cuties and throw them on top - it really made the salad.
Busy-ness #4: I saw this on Pinterest, a post at Alphamom about
making bento box lunches for kids. Then I
googled it and found so many images and links and whatnot, I was a little overwhelmed. So this is what I accomplished this morning:
Nowhere near the cute perfection of Alphamom, but still tasty looking.
Now I have to get cute basic cookie cutter shapes to prettify my bento lunches.
Hasta la chow chow!
Mary


